
Conduit crystal Subnautica 2: what it is and how it is used
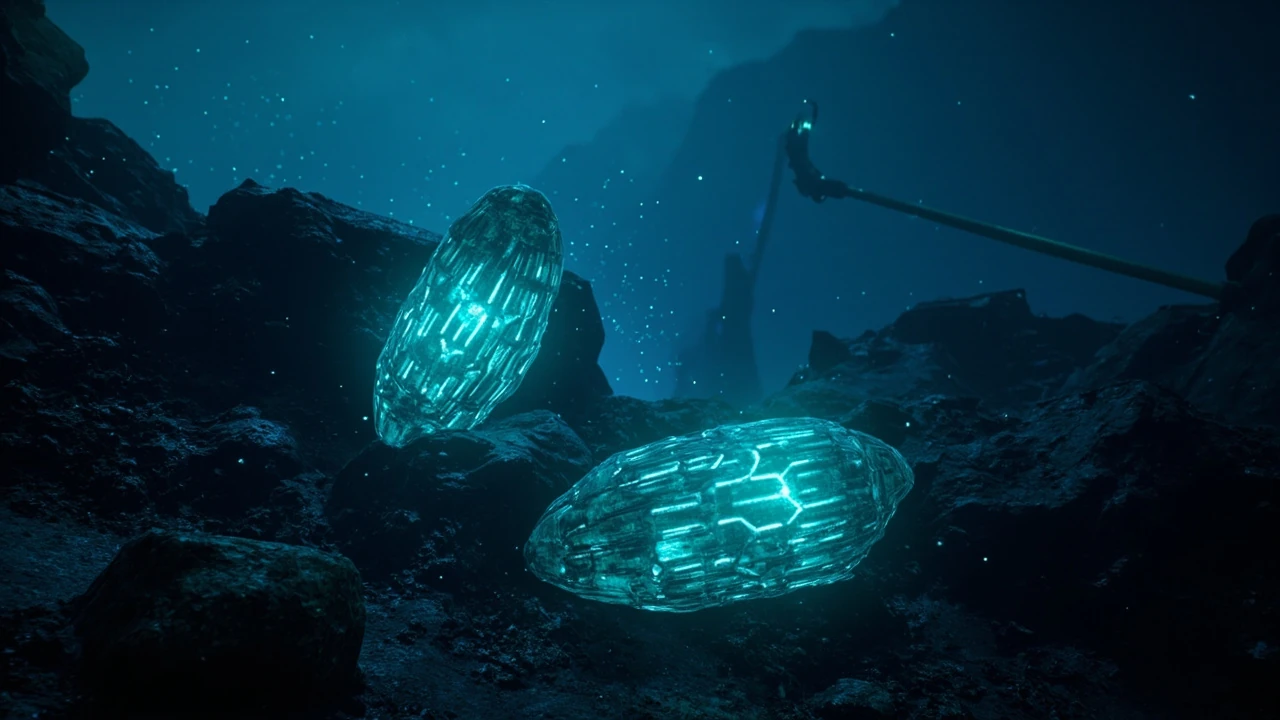
A conduit crystal in Subnautica 2 is a mid-to-late game resource that sits between raw mineral gathering and the electrical systems that keep deep biomes livable. Players encounter it as a glowing, geometric mineral that converts ambient thermal and kinetic energy from its surroundings into a storable electrical charge. In practice it is both a crafting component and a working part of certain seabase power grids, which is why most players treat it as a hybrid material rather than a simple ore.
The crystal is described in community datamines and in-game scanner entries as a “pressure-rated conductive lattice,” which is shorthand for a mineral that holds its electrical properties under the kind of stress a deep seabase experiences. A standard copper wire loses too much resistance past five hundred meters; a conduit crystal does not, which is the practical reason it appears in so many high-pressure recipes. The same property also lets the mineral behave as a passive smoothing element in a power circuit, a feature that ordinary ores do not have.
For new players, the simplest mental model is this: treat the crystal like a battery ingredient and a circuit part at the same time. A stack of ten crystals will get a solo player through the early thermal build, a moderate seabase expansion, and the first set of vehicle upgrades without forcing a return to the lava zone. That is a useful working target for the first few sessions of a new save.
How conduit crystal fits into Subnautica 2’s resource layers
Subnautica 2 divides its resources into a small number of overlapping layers: raw ores, refined alloys, biological samples, and energy materials. Conduit crystal lives in the energy layer alongside lithium, uranium, and crystalline sulfur. What sets it apart is that the resource is not consumed only when smelted. Several pieces of equipment accept a conduit crystal directly, which keeps the item relevant even after the player has built a full refinery chain.
From a design standpoint, this is a deliberate choice. Unknown Worlds has a history of giving mid-tier resources a second life in higher-tier systems. In the original Subnautica, the gel sack and the deep shroom both served as food and as components for advanced equipment. Conduit crystal follows the same pattern: a single node that solves two different progression problems, which is part of why it has become one of the more discussed materials in the early access community.
The energy layer also interacts with the exploration layer in a way that matters for route planning. A crystal node tends to appear near a heat source, which means a player who is already heading into a thermal vent for a different reason can often piggyback a small crystal run onto the same trip. The reverse is also true: a player who commits to a crystal farm in the lava zone is rarely more than a short detour from sulfur, basalt, and several of the volcanic alloys needed for the same base build.
Why the resource behaves like a hybrid material
The hybrid design is visible in three concrete mechanics:
- Direct equipment use. Some mid-game tools accept a conduit crystal in a dedicated slot rather than requiring it to be smelted first, which preserves the player’s stock of refined materials.
- Circuit compatibility. When placed inside a seabase power network, the crystal acts as a passive regulator that smooths the output of nearby thermal reactors.
- Trade value. The item is accepted by fabricators at a higher exchange rate than common ores, giving it a long-tail use even for players who rarely craft with it directly.
There is also a small fourth mechanic that is easy to miss: the crystal’s scanner value. A scanned node contributes a meaningful chunk of progress toward the scanner room’s data tally, which is useful for players who are still building toward the deeper fragments. That scanning bonus is a side benefit rather than a primary reason to farm, but it does mean a crystal run tends to push the player closer to two or three other unlocks at the same time.
Crafting recipes that use a conduit crystal
Across the current early access build, conduit crystal is consumed by a focused set of recipes rather than scattered across the entire fabrication tree. Players who plan ahead usually gather eight to twelve crystals before they attempt their first serious deep dive, so the rest of the base build can continue without backtracking. The recipes below combine the in-game scanner data that ships with the build, community datamines, and patterns that match the original Subnautica upgrade path. Numbers may shift between patches.
| Recipe | Crystals required | Other key components | Where the recipe unlocks |
|---|---|---|---|
| Conduit Charge Cell | 2 | Lithium, titanium ingot, wiring kit | Scanner room data terminal after scanning a crystal node |
| Thermal Regulator Module | 3 | Polyaniline, glass, advanced wiring kit | Fabricator after a Seabase Power Station fragment is scanned |
| Pressure-Tolerant Lantern | 1 | Enameled glass, luminescent sap, copper wire | Tool fabricator after the first crystal fragment is scanned |
| Cyclops-class Auxiliary Power | 4 | Plasteel, aerogel, power cell, advanced wiring kit | Vehicle upgrade console after the auxiliary power fragment is scanned |
| Heat-Shielded Cable Sheath | 1 | Polycarbonate, rubber, copper wire | Deployable fabricator, tier 2 unlocks |
| Seabase Surge Buffer | 2 | Battery cell, polyaniline, advanced wiring kit | Fabricator after a thermal reactor fragment is scanned |
| Prawn Suit Heat Sink | 2 | Aerogel, titanium ingot, rubber | Vehicle upgrade console after the prawn thermal module fragment is scanned |
If a specific recipe changes during early access, the broader rule still holds: conduit crystal is a regulated mid-tier ingredient, not a bulk commodity. A player who tries to substitute a smelted version of the crystal into one of the recipes above will usually end up with a failed craft and a wasted batch of secondary materials. The recipes also tend to be spaced out across the progression curve, so a single harvest run rarely unlocks more than two of them at once.
Direct slot usage versus smelting
Players sometimes ask whether they should smelt conduit crystal at the furnace for energy credits or keep it whole for direct recipes. Both options are valid, and the right choice depends on the current build goal.
- Keep the crystal whole when planning a thermal regulator module, a prawn suit heat sink, an auxiliary power upgrade, or any pressure-rated equipment, because the smelted form does not substitute for the raw node.
- Smelt surplus crystal for energy credits only when the player already has a stable supply line and several spares in storage. Smelting two or three crystals during a long smelter queue is rarely worth losing access to the recipes above.
- Reserve at least two crystals as emergency crafting stock before a deep exploration run, because a destroyed seamoth or prawn suit can drain the inventory quickly and a fresh crystal is often the fastest path back to a working vehicle.
- Track the smelter’s own temperature, because a furnace that is already working on a stack of titanium will not finish a conduit crystal smelt quickly. A small backup inventory often beats a slow smelter.
Where to find conduit crystal in the current build
Conduit crystal appears in three broad environment types. The distribution is biased toward volcanic and crystal-rich biomes, which matches its thermal and electrical role in the resource economy. Spawns are not fully deterministic, and the developers have rebalanced node counts between patches, so the table below should be read as a working map rather than a guarantee.
| Biome | Density of nodes | Depth range (meters) | Risk profile |
|---|---|---|---|
| Inactive Lava Zone edges | High | 900 to 1200 | High heat, low light, occasional leviathan class fauna |
| Crystal Caverns (deep shard region) | Very high | 700 to 1000 | Sharp terrain, limited visibility, acoustic predators |
| Thermal Vents and Sulfur Fields overlap | Medium | 400 to 700 | Heat plumes, moderate fauna, easy surface access |
| Underwater Islands (deep slopes) | Low to medium | 200 to 500 | Reaper patrol routes near the crater edge |
| Lost River junction walls | Medium | 500 to 800 | Bone shark packs, narrow tunnels, low oxygen pockets |
The Subnautica 2 entry on Wikipedia confirms the game’s early access status and shared-world direction but does not publish a full crafting catalog, so the in-game numbers above are presented with that limitation in mind. The two most reliable farms for solo players are the transition zones between the crystal caverns and the inactive lava zone, and the thermal vent walls that border sulfur fields. Both areas have predictable node spawns, but each requires a different piece of gear to be safe.
A useful habit is to mark a node cluster with a beacon on the first visit, then check back after two or three in-game days. Most clusters respawn within that window, and the beacon makes it easy to verify whether the patch has changed spawn rates. Players who skip the marker step often end up wandering the same wall and missing the cluster that they had already found, which is a small but recurring source of lost time.
Recommended route for a first harvest
- Start at a mid-depth moonpool equipped with a seamoth or a hover bike, plus a high-capacity inventory slot layout that reserves two slots for raw crystals and one slot for the smelted backup material.
- Scan a single node on a sulfur field wall to unlock the conduit charge cell recipe before committing to a long trip, so the harvest has a clear purpose.
- Descend along the thermal vent wall rather than across open water, because the wall itself blocks line of sight for the larger predators and gives the player a clean retreat path.
- Stop at the crystal cavern transition, harvest six to ten nodes, and bank the inventory in a small forward base or a deployable locker before pushing further.
- Return to the surface to refine and restock, then plan a second pass for the inactive lava zone once a heat-rated vehicle is available and the player has at least one repair tool loaded.
- Note any unusual spawns in the scanner log, because a few rare secondary resources tend to cluster near the same vents, and the same run can often pick up a small bonus haul without adding time.
Using conduit crystal in seabase power grids
Outside of crafting, conduit crystal is the simplest way to stabilize a mid-sized seabase that mixes thermal reactors with conventional power cells. Without a regulator, thermal output fluctuates, which forces the player to overbuild battery capacity to ride out the worst spikes. With a crystal in the circuit, the output curve is smoother and the battery bank can be smaller for the same effective uptime.
This is a small change in absolute numbers, but it is meaningful for players who want compact bases in deep biomes where space is at a premium. A typical three-reactor grid with a single regulator runs at noticeably steadier wattage, and the wiring kit is less likely to be overloaded by a sudden spike. Players who try to save space by dropping the regulator entirely usually end up with a base that browns out during a thermal surge, which then forces them to rebuild the same power room with a larger battery bank anyway.
| Grid configuration | Power output stability | Space cost | Best use case |
|---|---|---|---|
| 2 thermal reactors, 1 battery | Low without a crystal, medium with one | Compact | Forward outpost for exploration |
| 3 thermal reactors, 2 batteries, 1 regulator | High | Medium | Crystal cavern staging base |
| 4 thermal reactors, 3 batteries, 2 regulators | Very high | Large | Inactive lava zone research base |
| Nuclear reactor only | Very high, no crystal needed | Very large | Late-game primary base |
| Solar array plus single thermal reactor | Medium, day-night swings | Surface footprint | Shallow water research platform |
For a player who does not yet have nuclear access, the second row is the practical target. The third row is rarely worth the build cost until the player has a steady source of plasteel, aerogel, and additional crystals. Solar plus a single thermal reactor is a workable compromise for shallow bases, but it gives back the stability that the crystal was supposed to provide, so most mid-game bases skip that configuration.
A small but useful trick is to place the regulator module on a separate foundation from the reactors, then connect them with a heat-shielded cable sheath. The extra length forces the current through a longer path, which spreads the spike more evenly across the bank. That pattern costs an extra cable sheath and one extra foundation, and it is enough to remove most of the brownouts that a tight three-reactor grid tends to suffer.
Diagnostic checklist when a power grid is unstable
- Confirm at least one thermal regulator module is placed on the same power network as the reactors, and that the module is not disabled by a base power alert.
- Check that no battery cell is overcharged; an overcharged battery mimics a regulator failure and will drain the entire grid when it trips.
- Verify that the wiring kit is not the limiting factor. A basic kit caps at a lower wattage than an advanced kit and will produce brownouts that look like a regulator problem.
- Re-seat any loose solar panels if the base also relies on surface power, because solar output can mask or amplify thermal spikes depending on the time of day.
- Inspect the base’s foundation corridors for a missing power transmitter, because a base that spans two multipurpose rooms often drops a link without an obvious visual cue.
- Watch the in-game power graph for a steady sawtooth pattern rather than random spikes, which usually points at a single failing cell rather than a regulator problem.
Comparison with similar resources from the original Subnautica
Players who spent hundreds of hours in the original Subnautica will recognize the role, even if the name is new. The closest analog is the combination of kyanite and crystalline sulfur, which were used as crafting materials for depth modules and thermal equipment. Conduit crystal consolidates that pair into a single node, with a clearer electrical identity and a more restrictive recipe list.
| Original Subnautica resource | Closest Subnautica 2 role | Main difference |
|---|---|---|
| Kyanite | Conduit crystal (crafting slot) | Crystal is rarer and unlocks fewer recipes, but each recipe is more impactful. |
| Crystalline sulfur | Conduit crystal (circuit role) | Crystal has a passive in-place effect that crystalline sulfur lacked. |
| Nickel ore | Background tier 1 mineral | Nickel remains a bulk resource; crystal never replaces it. |
| Lithium | Energy tier 1 partner | Lithium and crystal are complementary rather than competing. |
| Blood oil | Vehicle power partner | Blood oil is still tied to the cyclops power cell chain; crystal is not a fuel substitute. |
Because the resource sits at the intersection of exploration, fabrication, and base engineering, the practical questions around it go beyond a basic “where do I find it.” Players also need to know what the crystal actually does inside a circuit, which recipes depend on it, and which locations are worth the dive in the current build. The wider context for the sequel, including its shared-world direction and early access status, is described in the Subnautica 2 entry on Wikipedia, which the rest of this page builds on with hands-on detail. Where the official documentation is thin, the information below is framed as community-observed behavior drawn from datamines and player logs.
The compression is part of a wider trend in the sequel. Unknown Worlds has been merging material pairs into single, more expressive nodes, which reduces inventory churn and gives each find a stronger identity. The trade-off is that the player has fewer forgiving substitute recipes, so a missed crystal node hurts more than a missed kyanite node did in the original game. The new pacing rewards planning a full route rather than reacting to whatever the scanner room happens to ping.
It also helps to remember that the original game’s resource economy leaned on variety for variety’s sake. A veteran player of the first title would routinely collect six or seven mid-tier ores on a single dive, most of which fed recipes that had obvious substitutes. Subnautica 2’s tighter list removes that forgiving feel, and conduit crystal is the cleanest example of the new rule: a small number of nodes, each with a heavier contribution to a smaller recipe pool.
Common mistakes when farming conduit crystal
Most of the friction around conduit crystal comes from preparation rather than the harvest itself. Players who bring the wrong vehicle, the wrong tools, or the wrong inventory layout end up spending the crystals they did manage to gather on emergency repairs, which leaves very little for the recipes they actually wanted to build.
Vehicle choice
The seamoth is fast but fragile, the prawn suit is slow but durable, and the hoverbike falls in between. For a conduit crystal run, the prawn suit is the safer pick because the relevant biomes include heat plumes that chip away at vehicle integrity. A prawn suit with a thermal upgrade can stay in the thermal vents for ten to fifteen minutes of harvest time before the integrity meter becomes a concern. A seamoth in the same area has a much shorter window, and the hoverbike is too exposed near the lava zone edges.
For a player who does not yet own a prawn suit, a seamoth with a depth module and a reinforced hull is the second-best option. The route should then stay in the upper thermal vents, where the heat is lower and the seamoth can dock on a shelf between passes. Underwater islands are a third option, but the reaper patrol routes make the run expensive in repair materials, so most players reserve those islands for quartz and titanium rather than crystals.
The hoverbike tends to work best as a support vehicle rather than a primary one for crystal runs. It is fast enough to scout a new cluster and confirm the node density before the player commits a prawn suit, which is a useful role even if the bike itself is too fragile for the harvest pass.
Inventory and tool selection
- Bring a high-capacity storage module rather than relying on the vehicle’s default slots, because crystal nodes tend to appear in clusters and a full inventory after the third pick is a common failure mode.
- Pack a repair tool, because the same terrain that produces crystals will also damage the suit, and a damaged vehicle rarely makes it back to the moonpool on the first pass.
- Carry at least one flare or a luminescent sap lantern, both for visibility and to mark the path back to the seamoth or prawn suit, especially inside the crystal caverns where the compass is unreliable.
- Avoid bringing radioactive or explosive material in the same trip, because crystals are often harvested near thermal vents where a stray explosion can collapse a tunnel and strand the player on the wrong side of the deposit.
- Set the inventory filter so that raw crystals are sorted above smelted ore, which makes the bank at a forward locker faster and reduces the chance of accidentally smelting a load that should have been saved.
- Keep one slot free for a single beacon, so the player can mark a new cluster on the way out and come back to it on a planned rotation.
Time of day and weather
Subnautica 2’s day-night cycle affects acoustic predators more than the crystal spawns themselves, but the perceived safety of a run still changes. Experienced players usually schedule the deepest crystal runs for the local afternoon window, when surface light reaches further down and reapers are less active. The crystal nodes are still there at night, but the increased fauna pressure makes the same route two to three times more expensive in repair materials.
Storms on the surface do not directly affect underwater crystal spawns, but they do reduce visibility through the shallows and can push floating debris into the descent path. Players who descend through the kelp forest during a storm often lose ten to fifteen minutes navigating around kelp tangles and broken buoy lines. A clear-weather window is worth waiting for, especially on a first run, and the difference between a calm descent and a stormy one is often the difference between a clean bank and an aborted dive.
For players in the southern hemisphere of the game map, the storm window tends to be shorter and the fauna pressure a touch lower. That small geographic quirk is not enough to change the route, but it does mean a player who has settled a base in the south can usually run a tighter schedule than one who has built in the more exposed northern shallows.
Storage, banking, and long-term inventory planning
Conduit crystal is one of the few mid-tier resources in Subnautica 2 that the player is likely to bank in significant quantities rather than consume on the spot. The recipes that depend on it are spaced out across the progression curve, and each recipe draws from a different ingredient stack. A typical player who builds a single thermal regulator module, a pressure-tolerant lantern, and a heat-shielded cable sheath in the same session will spend five to seven crystals at once, which is more than a single harvest run produces in the early game.
A simple rule is to keep eight crystals in active storage at all times once the player has unlocked the thermal regulator recipe. Below that threshold, every new harvest run should be a priority. Above that threshold, the player can spend crystals freely on smaller projects such as the lantern or the cable sheath without planning a dedicated farm. The same rule works in shared mode, with the caveat that two players pulling from the same locker will drain the buffer twice as fast.
Forward lockers matter as much as the main seabase. The crystal cavern transition is far enough from any safe moonpool that banking at the surface is wasteful without a mid-depth locker. A small two-room outpost with a single battery, a fabricator, and a storage bin cuts each round trip from roughly twenty minutes to about eight, which changes how often a player is willing to commit to a deep run. Adding a second locker at the inactive lava zone edge further reduces the surface round-trip cost for late-game upgrades.
Long-term storage deserves a separate container from active use. A locked storage bin near the main fabricator tends to become a junk drawer after a few sessions, and a player who stores crystals in the same bin as low-value ore will eventually smelt the wrong stack. A dedicated labeled bin is a small organizational step that pays for itself the first time a player needs to find a crystal at speed.
Conduit crystal in shared and co-op play
Subnautica 2’s shared mode is one of the headline features of the sequel, and it changes how conduit crystal fits into a group session. Resource nodes are still tied to a player’s own instance, so two divers in the same party will not deplete the same crystal cluster. Inventory, by contrast, is personal, which means a friend cannot hand over a spare crystal mid-run. The practical upshot is that each diver still has to plan a personal harvest rotation rather than pooling outputs, even when the rest of the base is shared.
Co-op play does change the optimal build order, because a group can split roles. One player can run thermal regulators while another banks the inventory at a forward locker, which compresses the time between harvest and base upgrade. Players who are used to playing solo often need a session or two to adjust to the fact that the supply chain is now two parallel chains rather than one, and that any recipe that depends on conduit crystal has to be planned as a coordinated effort rather than a personal checklist.
Voice chat helps a lot here. Most co-op frustrations around conduit crystal come from one player starting a thermal regulator build while the other is still on the first harvest run, which leaves the build waiting on a component that the second player thought was already banked. A quick status check at the start of each session is usually enough to keep both players on the same page, and it avoids the more common failure mode of one player spending crystals on small projects while the other is gearing up for a major build.
What to do with conduit crystal in late-game
By the time the player has access to the inactive lava zone and a nuclear reactor, conduit crystal starts to look like an early-game luxury. The reality is more mixed. The thermal regulator module remains the most space-efficient way to stabilize a secondary base, and the heat-shielded cable sheath has no nuclear-era equivalent. Crystals also keep their value as a trade good with the fabricator, which is useful for players who want to convert surplus into a different tier of material without spending time at a smelter.
A reasonable late-game target is a stockpile of roughly twenty to twenty-five crystals. That is enough to support two parallel mid-sized bases plus the occasional small upgrade on a hoverbike or a seamoth. Beyond that, the marginal return on more crystals drops sharply, and the player is better off spending time on other resource chains. Players who reach that threshold and find their bases stable usually shift the harvest rotation to once every several in-game weeks, which keeps the buffer topped up without dominating the play session.
There is also a quiet role for the crystal in end-game exploration. A few of the deepest fragment chains require small re-builds of mobile base infrastructure, and a player who carries four or five crystals on a long-range trip can field-repair a regulator or a cable sheath without cutting the run short. That use case is too small to drive a farm, but it is enough to justify keeping a few crystals in the vehicle locker as a habit rather than an exception.
Frequently asked questions
Is conduit crystal a real item in Subnautica 2?
Conduit crystal is referenced in community datamines and in-game scanner data as a mid-tier energy resource. Because the game is in early access, the exact name and recipe list can shift between patches, so the current build should be treated as the only source of truth for the player’s own session.
Where is the safest place to farm conduit crystal for a new player?
The thermal vent walls that border sulfur fields are the safest first stop. They are at a depth that a basic seamoth with a depth module can reach, and the fauna pressure is manageable. Players who have access to a prawn suit with a thermal upgrade can move on to the crystal cavern transition for a higher yield.
Can conduit crystal replace a thermal regulator module?
No. A conduit crystal is a component used to build a thermal regulator module. The finished module is what stabilizes the power grid. Carrying the raw crystal in a hot inventory slot does not by itself regulate a reactor.
Does conduit crystal respawn after a harvest?
Nodes respawn on the standard Subnautica timer of several in-game days, similar to most mineral resources. The exact interval is not officially published, so players who run a tight schedule should leave a marker on the node cluster and revisit it on a planned rotation.
Is it worth smelting conduit crystal for energy credits?
Only when the player has a comfortable surplus and no immediate plan to build a thermal regulator module, a pressure-tolerant lantern, or a cyclops auxiliary power upgrade. Smelting gives a small credit return, while a raw crystal unlocks recipes that no smelted product can.
What is the difference between conduit crystal and crystalline sulfur in Subnautica 2?
Crystalline sulfur is a focused thermal material used mainly in heat-shielded equipment. Conduit crystal is broader: it covers both the thermal and the electrical side of seabase engineering, and it appears in recipes that crystalline sulfur does not, including the conduit charge cell and the thermal regulator module.
Do I need a full set of advanced wiring kits to use conduit crystal recipes?
Most recipes that include conduit crystal also ask for at least one advanced wiring kit. The basic wiring kit works for the pressure-tolerant lantern, but anything that touches the power grid usually requires the advanced version. Players who plan a full crystal-based build should gather the wiring kits before the long harvest run, because advanced wiring kits require their own multi-step crafting chain.
Will conduit crystal become more important in later Subnautica 2 updates?
It is reasonable to expect the resource to remain central, because it is the cleanest material that connects the early energy tier with the late-game thermal and electrical systems. The early access roadmap for the game points to more deep biome content, and deeper biomes always need better power and heat management. A resource that solves both problems is unlikely to lose its role.
Can two players share a single conduit crystal node in shared mode?
In the shared multiplayer mode, nodes are independent per instance rather than shared across the whole session, so each player can harvest a node in their own world without blocking the other. Inventory is also personal, which means players should not expect to draw from a friend’s harvested crystal in real time.
What is the best inventory layout for a conduit crystal farming run?
Reserve two slots for raw crystals, two slots for emergency repair materials, and the rest for high-capacity storage. Keeping the crystal slots at the top of the inventory makes it easier to bank quickly at a forward base without mixing them with the smelted output.