Jack Hall Gang Map 2 in Red Dead Redemption 2
Jack Hall Gang Map 2 is the second treasure chart in the Jack Hall Gang treasure hunt in Red Dead Redemption 2, and it is the one most players misplace. After you finish the climb at Caliban’s Seat, the game simply hands you a new map and a fresh riddle, with no marker on the HUD to tell you where to go next. The second map sends you to a remote corner of Ambarino, and the dig itself is hidden inside a stack of ordinary-looking rocks next to a geyser field. If you arrive at the wrong side of the lake or walk in with a posse that has already spooked the area, the chest can feel impossible to find.
Map 2 sits in the middle of a three-map chain that turns a cheap paper chart into two solid gold bars worth $500 each, and it is also the only step where the puzzle feels designed rather than just a follow-the-arrow task. This guide walks through the prerequisites, the route from Caliban’s Seat to Cotorra Springs, how to read the stone piles once you arrive, and what to do after you have the third map in your satchel.
Where Jack Hall Gang Map 2 Fits in the Treasure Hunt
The Jack Hall Gang hunt is a three-map chain that opens in Chapter 2, long before most other treasure hunts become available. You start it by buying the first map from a stranger named Maximo, who camps on a ridge northwest of Flatneck Station, north of Bard’s Crossing. If you walk away from that conversation, the first map resurfaces later at a fence, so no choice locks you out of the quest. Once you have Map 1 in hand, the chain is straightforward: each map points to a small physical location, and solving that location rewards you with the next map in the series.
Map 2 is the middle link. Solving it does not give you gold; it gives you Map 3, which is the map that leads to the final gold-bar cache at O’Creagh’s Run. That middle step is also where a lot of players stall, because the environment around Cotorra Springs is quieter than Caliban’s Seat and there is no obvious landmark until you know to look for the rock piles.
Map progression at a glance
- Map 1 (purchase from Maximo) sends you to a crevice on a rock formation south of Valentine called Caliban’s Seat.
- Map 2 (found in the crevice at Caliban’s Seat) sends you to the stone piles beside the geysers at Cotorra Springs in Ambarino.
- Map 3 (found in the centre of those stone piles) sends you to a small rocky island in the lake at O’Creagh’s Run, where the two gold bars are buried.
Each step requires you to physically inspect an object in the world. There is no cinematic, no NPC dialogue, and no mission entry, so it is easy to miss a step in the middle if you wander off after Map 1.
Prerequisites Before You Start the Jack Hall Gang Chain
Jack Hall Gang Map 2 is part of a chain, so a few small things need to be in place before you can pick it up. Most players can start the hunt very early, but a handful of edge cases can hide the first map from you if you rush.
Story and chapter state
- The treasure hunt becomes available in Chapter 2, which means you do not need to push deep into the main story to begin.
- You must be able to ride freely into the Grizzlies West region of Ambarino, where Cotorra Springs sits. The path to Map 2 is gated by elevation and weather more than by story.
- You do not need to have completed the nearby Legendary Animal mission, and you do not need to engage the wolf that patrols the Cotorra Springs area in order to read the map stone.
Items and supplies worth packing
- Warm clothing, because the climb to Caliban’s Seat and the ride to Cotorra Springs both run through cold regions. A cold-weather coat or a warm hat is enough to stop the stamina drain from cold.
- A horse with decent Stamina and a good handling rating, since the second half of the approach to Caliban’s Seat is a narrow ledge walk rather than a trail ride.
- A satchel with at least one free slot, because Map 2 is a physical item, not a journal entry. If your satchel is full the chart sits in the world and is easy to overlook.
- Any weapon you like for the wolf near Cotorra Springs, in case you want to hunt it on the way past. The map stone is not behind the wolf, so the fight is optional.
Step 1: Reading Jack Hall Gang Map 1 at Caliban’s Seat
Map 1 points to a rock formation south of Valentine known as Caliban’s Seat. From the east, the formation looks like a tilted slab of rock with a few broken ledges spilling down its right-hand side. That eastern face is the only safe way to the top; the other sides drop away into deep water and have no handholds.
Once you reach the summit, work your way along the narrow path that runs down the right-hand side of the rock. The path breaks into a short series of ledges with small gaps between them. Take your time crossing the gaps, especially in heavy snow or low visibility. The last ledge ends in a crevice in the rock wall, and inspecting that crevice hands you Jack Hall Gang Map 2. There is no gold at this stage; the only reward is the chart itself.
Common failure points at Caliban’s Seat
- Approaching the rock from the west or south. The slopes on those sides are technically climbable but they do not connect to the path that leads to the crevice.
- Missing the right-hand ledge. The intended path hugs the right side of the formation as you face the rock from the east. The left-hand ledges are decorative and do not continue down.
- Skipping the crevice because it looks like ordinary shadow. The crevice is low and partially hidden, so crouch and look at the rock wall at chest height when you reach the end of the ledge.
Step 2: Route to Cotorra Springs in Ambarino
Jack Hall Gang Map 2 is a hand-drawn chart of a lake in the Grizzlies West region, with three small dots circled near a set of stacked stone piles. The lake on the chart matches Cotorra Springs almost exactly, including the cluster of steaming geysers on its southern shore. The stone piles the chart points to sit just east of those geysers, between the water and a small rise that overlooks the basin.
The fastest route is to ride north out of Valentine on the main road, follow it across the Cumberland River, and continue up into Ambarino. Once you cross into the snow line, the road curves west and the trail into Cotorra Springs branches off toward a frozen pond. The geyser field is the easiest landmark to navigate by, because the steam is visible from a long distance even in a blizzard.
Navigation cues along the way
- The trail that drops into the Cotorra Springs basin is narrow and easy to miss in whiteout conditions. Use the geyser plumes as your vertical reference and the frozen pond as your horizontal reference.
- A pack of wolves frequently patrols the ridge above the geyser field. The pack does not gate the treasure, but it can interrupt you if you try to read the map stone in the middle of a howl-and-circle engagement.
- The Legendary Wolf that can spawn in this area is a separate encounter. You do not have to defeat or even locate the Legendary Wolf to pick up Map 2.
Step 3: Finding the Stone Piles at Cotorra Springs
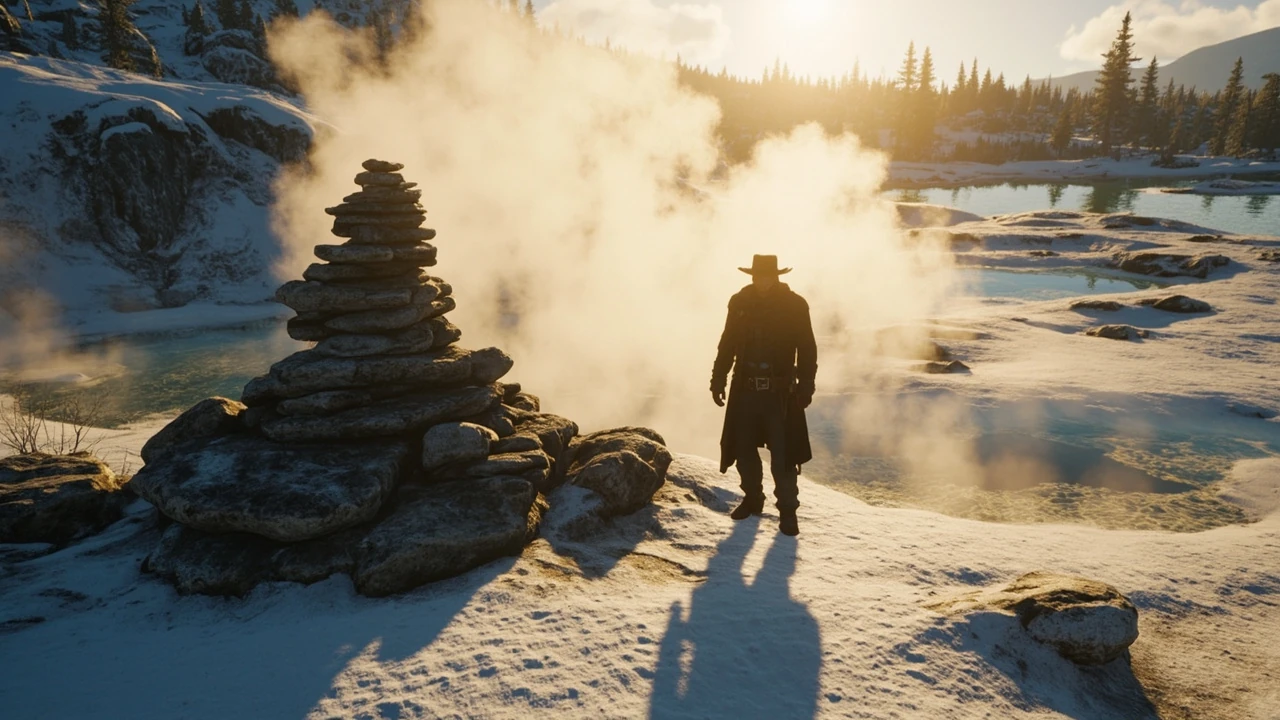
The second map’s riddle is a small group of stone piles beside the geysers, and the solution is more compact than the climb at Caliban’s Seat. The piles are arranged in a loose ring, with one slightly taller pile in the centre of the formation. Each pile is the kind of stacked-rock cairn you would expect to see in a high-country camp, and several of them are close enough together that a player on horseback can mistake the entire group for a single decoration.
To solve the puzzle, walk into the ring of piles and inspect the centre pile. The interaction prompt is subtle; the chart does not glow and the pile does not animate. When you press the prompt, your character reaches down and produces Jack Hall Gang Map 3, which goes straight into your satchel. There is no completion cinematic, and the rest of the piles remain in the world as scenery.
How to tell the centre pile apart
- It is the only pile in the ring that has a small flat stone balanced on top. The other piles are tapered.
- It sits directly on the line between the two largest geysers, which makes it a useful sight line if you approach from the south.
- It is the only pile you can interact with. If you press the wrong prompt on a neighbouring pile, nothing happens, which is itself a useful diagnostic signal.
Step 4: What to Do With Jack Hall Gang Map 3
Map 3 closes out the treasure hunt. It depicts a small island in a lake, with a single X drawn at one end. The chart matches O’Creagh’s Run, a glacial lake south of the main road in the far north-east of the map. The cache sits on a tiny rocky island in the middle of the lake, and the chest contains two gold bars.
To finish the chain, ride to O’Creagh’s Run, find the small island in the lake, and either wade or swim out to it. The island is small enough that you can reach the chest from the shore on foot in some seasons, but in deep winter the cold-water swim is the more reliable route. Inspect the loose rock on the island to collect the two gold bars, then sell them to a fence for a total of $1,000.
Treasure reward summary
- Map 1 (sold or given) has no reward; it is the entry point for the chain.
- Map 2 (found at Caliban’s Seat) has no gold reward; it is the second map.
- Map 3 (found at Cotorra Springs) leads to two gold bars at O’Creagh’s Run, worth $500 each at a fence.
Reading the Map 2 Chart Itself
The Map 2 chart is one of the more useful items in the chain, because the artist drew the destination rather than just labelling it. If you slow down and look at the chart in the Documents tab of the satchel, you can see the lake, the geysers along the southern shore, and three small dots circled near the stone piles. That makes the chart useful as a navigation aid even before you have been to Cotorra Springs.
Players sometimes confuse Map 2 with a separate map they have picked up elsewhere, because the chart is small and the cartography style is similar to the other treasure maps in the game. The chart that comes out of Caliban’s Seat is the one drawn in faded ink with a small ring of dots, not the bolder chart you may have picked up from a fence in another quest.
Map 2 visual cues worth noting
- Three small dots are circled on the chart. The middle dot corresponds to the centre pile, which is the one that opens the next step.
- The southern edge of the chart shows a wavy line that represents the geyser field. That is the landmark to use once you reach the basin.
- There is a small compass rose in the corner of the chart. The compass orientation matches the in-world compass, so the chart can be held up against the sky as a quick sanity check.
Common Mistakes and Confusion Around Map 2
Because Map 2 sits in the middle of a chain, it is also the point where most casual guides skip details. Players will often complete Map 1, pick up Map 2, and then wander around Ambarino without realising they were already standing on the answer. The most common sources of confusion are environmental, not quest-related.
Where players typically get stuck
- Looking for a single large rock instead of a ring of piles. The destination is a cluster, not a single formation.
- Skipping the centre pile because it looks like scenery. The centre pile is the only interactive object in the ring.
- Chasing the Legendary Wolf spawn in the basin. The wolf is a separate hunt, and it does not gate the treasure chest.
- Confusing Cotorra Springs with a different hot spring to the south-east. The map shows geysers on the southern shore, which only matches the Ambarino basin.
Timing, Weather, and Other Practical Conditions
Map 2’s location is at high elevation, so it is worth thinking about when you go. The basin around Cotorra Springs is exposed and the wind drops the apparent temperature quickly. A few small choices make the run much smoother.
Best time of day and weather
- Midday offers the best visibility, since the geyser plumes are easier to pick out against a bright sky and the stone piles cast clear shadows.
- Clear weather is preferable but not required. The plumes stay visible in light snow, which actually makes the geyser field easier to read.
- Night-time runs are possible, but the contrast between the snow and the dark stone piles drops significantly, which makes the centre pile harder to spot.
Horse and stamina management
- Bond your horse to at least level 2 before the climb, so it will not throw you on the narrow ledges at Caliban’s Seat.
- Keep a few stamina tonics in the saddlebag for the final approach. The ledge walk is short but it punishes a low-stamina horse.
- If you plan to hunt the Legendary Wolf while you are in the basin, bring a rifle with enough range to land a clean first shot. The wolf flees fast once it takes damage.
Map 2 Compared With the Other Two Steps
The three maps in the Jack Hall Gang chain feel very different to play through, even though they share a single reward. Map 2 is the bridge step, and it is the one with the most environmental puzzle baked into it.
| Step | Where you start | What you do | What you earn |
|---|---|---|---|
| Map 1 (purchase) | Maximo’s ridge north of Bard’s Crossing | Buy the chart and read it | The first map |
| Map 2 (Caliban’s Seat) | Rock formation south of Valentine | Climb the east face and inspect the crevice | Jack Hall Gang Map 2 |
| Map 2 (Cotorra Springs) | Stone piles beside the geysers at Cotorra Springs | Inspect the centre pile | Jack Hall Gang Map 3 |
| Map 3 (O’Creagh’s Run) | Small rocky island in the lake | Wade or swim to the island and inspect the loose rock | Two gold bars worth $1,000 |
The middle step is also the only one where the answer is a small object that does not visually distinguish itself from the surrounding scenery, which is why the chart in your satchel and the steam from the geysers are such useful aids.
Fitting the Hunt Into a Broader Treasure Strategy
Jack Hall Gang is one of the earliest high-value treasure chains in the game, and it pairs well with a few of the other early hunts. The gold bar reward at the end is the same as the reward for several single-map hunts, and the chain tends to slot in cleanly between the early story missions and the player’s first pass through the Grizzlies.
Treasure chains that pair well with Jack Hall Gang
- Poisonous Trail Treasure Hunt, which is also a three-map chain that ends in two gold bars and routes through a similar range of terrain.
- High Stakes Treasure Hunt, which is a longer chain that can be saved for a second loop through the Grizzlies once you have the route to Cotorra Springs memorised.
- Le Tresor Des Morts, which is a single-map chain that does not require travel into Ambarino and is a good warm-up before you commit to the Jack Hall Gang climb.
Doing two of these chains in the same ride is a reasonable plan, because the route north out of Valentine is the same for all of them and the Grizzlies West region is the common geography.
What to Do if the Map 2 Stone Will Not Activate
Most activation issues at Cotorra Springs come from one of three causes, and a quick diagnostic pass through them usually clears the problem.
Diagnostic checklist for a non-responsive centre pile
- Confirm you are inspecting the centre pile and not one of the outer piles. The outer piles are decorative and have no prompt.
- Confirm you have a free satchel slot. If your satchel is full, the chart does not visibly enter your inventory and the interaction can feel like it failed.
- Confirm you are not mid-combat with a wolf or other predator. Some interactions cancel if you are under attack, which can look like a broken prompt.
- Confirm you are on the right side of the geyser field. The stone piles sit east of the largest geysers, and a player who approaches from the west can easily reach the wrong cluster of rocks.
Walking a slow lap around the geyser field and counting the piles usually resolves the issue without leaving the basin. The centre pile has a distinctive flat stone on top that becomes obvious once you are looking for it.
Key Takeaways for the Jack Hall Gang Map 2 Step
Jack Hall Gang Map 2 is a simple chart to read once you have it in your satchel, but it is also the easiest link in the chain to misread in the field. The map is drawn accurately, the destination is in a well-known landmark, and the centre pile is interactable without any setup, but the cluster of stones looks ordinary until you have been told what to look for.
| Item | Detail |
|---|---|
| Map 2 source | Crevice in the rock wall at Caliban’s Seat, south of Valentine |
| Map 2 destination | Stone piles east of the geyser field at Cotorra Springs, Ambarino |
| Map 2 reward | Jack Hall Gang Map 3 |
| Map 2 prerequisites | Chapter 2 or later, warm clothing, free satchel slot |
| Map 2 optional encounters | Pack of wolves on the ridge, Legendary Wolf in the basin |
| Map 2 next step | Two gold bars at O’Creagh’s Run, worth $1,000 at a fence |
Once you have Map 3 in hand, the rest of the hunt is a short ride to O’Creagh’s Run and a chest that contains the actual payoff for the chain.
Frequently asked questions
Where do you find Jack Hall Gang Map 2 in RDR2?
You find Jack Hall Gang Map 2 in a crevice in the rock wall at the bottom of the right-hand ledge path on the rock formation south of Valentine called Caliban’s Seat. Approach the formation from the east, climb to the top, and follow the narrow ledges down the right side. Inspecting the crevice at the end of the path adds Map 2 to your satchel.
Do you have to fight the Legendary Wolf to get Map 2?
No. The map stone is at the centre of the stone pile ring beside the geyser field, and the puzzle does not require you to engage any animal in the area. The Legendary Wolf is a separate hunt that you can take on its own schedule, with no impact on the treasure chain.
What chapter do you need to be in to start the Jack Hall Gang chain?
The chain becomes available in Chapter 2, which is when you can first buy the first map from Maximo. There is no requirement to push deeper into the main story before you begin.
Does Map 2 give you any gold bars on its own?
No. Solving Map 2 only gives you Map 3. The two gold bars, worth $500 each, sit in the final cache at O’Creagh’s Run and are the only gold reward in the entire chain.
Can you solve Map 2 without a horse?
Technically yes, but the ride to Caliban’s Seat and then on to Cotorra Springs is long enough that a horse saves a substantial amount of time. The ledge walk at Caliban’s Seat is on foot either way, and a bonded horse is less likely to buck you off the narrow rock.
What if you already missed Maximo before finding Map 1?
The first map later becomes available from any fence, so missing the initial encounter with Maximo does not lock you out of the chain. The rest of the chain, including the Map 2 step, works the same way regardless of where you picked up the first map.
How much is the full Jack Hall Gang chain worth?
The chain is worth two gold bars in total, which sell to a fence for $1,000. There is no incremental reward at the Map 1 and Map 2 steps, and no bonus for completing the chain in any particular time frame.
Does Map 2 still work after you finish the main story?
Yes. Treasure maps remain active after the credits roll, and the Jack Hall Gang chain is a free roam activity that you can complete in any chapter or after the epilogue. The chain has no time limit and no associated main-story state.
Can you co-op the Jack Hall Gang chain with a friend?
Red Dead Redemption 2 does not include drop-in co-op for treasure hunts, so the chain is a single-player activity. You can still ride alongside another player and watch the encounter, but the prompt and the chest are only available to the host.
What is the difference between the stone piles at Cotorra Springs and the other rocks in the area?
The stone piles in the puzzle are arranged in a loose ring east of the geyser field, with one taller pile in the centre. The other rocks in the basin are natural formations without the same ring layout, and only the centre pile in the puzzle ring can be inspected for the next step of the chain.