

Genshin Impact Escoffier Is One Number Wearing a Chef’s Hat
Five percent. Ten percent. Fifteen percent. Fifty-five percent. That is her fourth ascension passive, and I want you to sit with how strange that fourth value is. Three orderly steps of five, and then a forty-point jump. Not a curve. A cliff. Every meaningful decision about this character comes back to whether you are standing on top of that cliff or at the bottom of it, and the gap between those two positions is larger than the gap between most characters and their own replacements.
So rather than walk you through a kit summary you can read on any wiki, let’s examine the single number from four directions: what triggers it, who is allowed to trigger it, what it costs you to trigger it, and what it hands back once you do. Then the build, which turns out to be entirely downstream of the same question.
Her rerun went live today, October 13, at 18:00 server time, which makes this a decision with a deadline. We will get to the banner details at the end.
The Genshin Impact Escoffier Cliff, Written Out
The passive is called Inspiration-Immersed Seasoning. It counts how many Hydro or Cryo characters are in your party, then reduces both Hydro and Cryo resistance on anything her Skill or Burst connects with, for twelve seconds.
| Hydro or Cryo Characters in Party | Hydro and Cryo RES Shred |
|---|---|
| 1 | 5% |
| 2 | 10% |
| 3 | 15% |
| 4 | 55% |
Three to four is worth forty percentage points on its own. For scale, a typical four-piece artifact set bonus sits in the region of fifteen to twenty percent damage, and people rebuild whole accounts around those.
And the cliff is not alone up there. Her first constellation carries the same four-member requirement, and when it is satisfied it grants nearby party members sixty percent Cryo CRIT damage for fifteen seconds. So C1 is not a gentle numerical bump the way most first constellations are – it is a second payout gated behind the identical condition, which means a C1 owner running three Hydro or Cryo units gets nothing from either half of her design.
That is the whole character. Everything else in her kit is good-to-very-good support work. This one passive is why she is discussed at all.
Who Is Actually Allowed Up There
Counting to four sounds trivial until you try it with a real roster. The requirement is four Hydro or Cryo characters including Escoffier herself, so you need three others. And they need to be three others that can hold a team together – a healer, an enabler, a damage source – not just three bodies with the right element.
The combinations people have settled on are narrower than the element pool suggests:
- Furina is close to mandatory in almost every version of this team, because she is Hydro, she buffs enormously, and she applies Hydro off-field.
- The damage slot is where the flexibility lives – Skirk, Ayaka, Wriothesley, Neuvillette, Ayato and Childe all qualify on element and all benefit from the shred.
- The fourth slot wants a second buffer, which in practice means Shenhe, Citlali or Vodyanitsa, all of whom keep the count intact.
- A fifth category barely exists. Once you have named Escoffier, Furina, a Cryo or Hydro carry and one more Cryo or Hydro buffer, you are full.
Three teams that keep all four slots legal:
Skirk, Escoffier, Furina, Vodyanitsa. The mono Hydro-Cryo core, all four elements compliant, maximum shred and C1 active.
Neuvillette, Escoffier, Furina, Citlali. The widely circulated Neuvillette setup, with Citlali or Shenhe in the final slot depending on what you own.
Ayaka, Escoffier, Furina, Shenhe. The classic freeze shell, which is also where Blizzard Strayer becomes worth considering.
Notice what is absent from all three. No Anemo. No Bennett. No Xilonen. Which brings us to the expensive part.
What the Fourth Slot Costs
This is the section most build guides skip, and it is the one that should actually decide your pull.
Swap any one of those Hydro or Cryo characters for an Anemo unit and the shred collapses from 55% to 15%. Forty points gone for one substitution. Her C1 switches off at the same moment.
So running her properly means giving up, for that team:
- Crowd control and grouping, which Anemo has provided to every serious team composition for years.
- Viridescent Venerer’s own resistance shred, since that set lives on Anemo characters and now has nowhere to sit.
- Bennett’s attack buff and healing, because he is Pyro and he does not count.
- Xilonen’s shred and defensive work, same problem.
- Elemental flexibility in general, since your reaction options narrow to freeze and vaporise-adjacent interactions.
That is a genuinely heavy bill. Anemo grouping in particular is not a luxury in a game whose hardest content throws multiple enemies at you with spread hitboxes, and a team with no Anemo character has to solve that problem by positioning instead.
The honest framing is this: Genshin Impact Escoffier does not slot into your existing roster. She asks you to build a team around her element requirement, and in exchange she pays that team more than a conventional support would. If you already own Furina plus a Cryo or Hydro carry, the bill is small because you were most of the way there. If your best teams are built on Anemo grouping and a Pyro buffer, the bill is most of your account.
What She Pays Back?
Once the condition is met, the return is substantial and it arrives in four separate currencies.
The shred itself, 55% on both Hydro and Cryo, applied to anything her Skill or Burst touches, for twelve seconds. Resistance shred is multiplicative with damage bonuses rather than competing with them, which is why it is valued so highly by people who do the arithmetic.
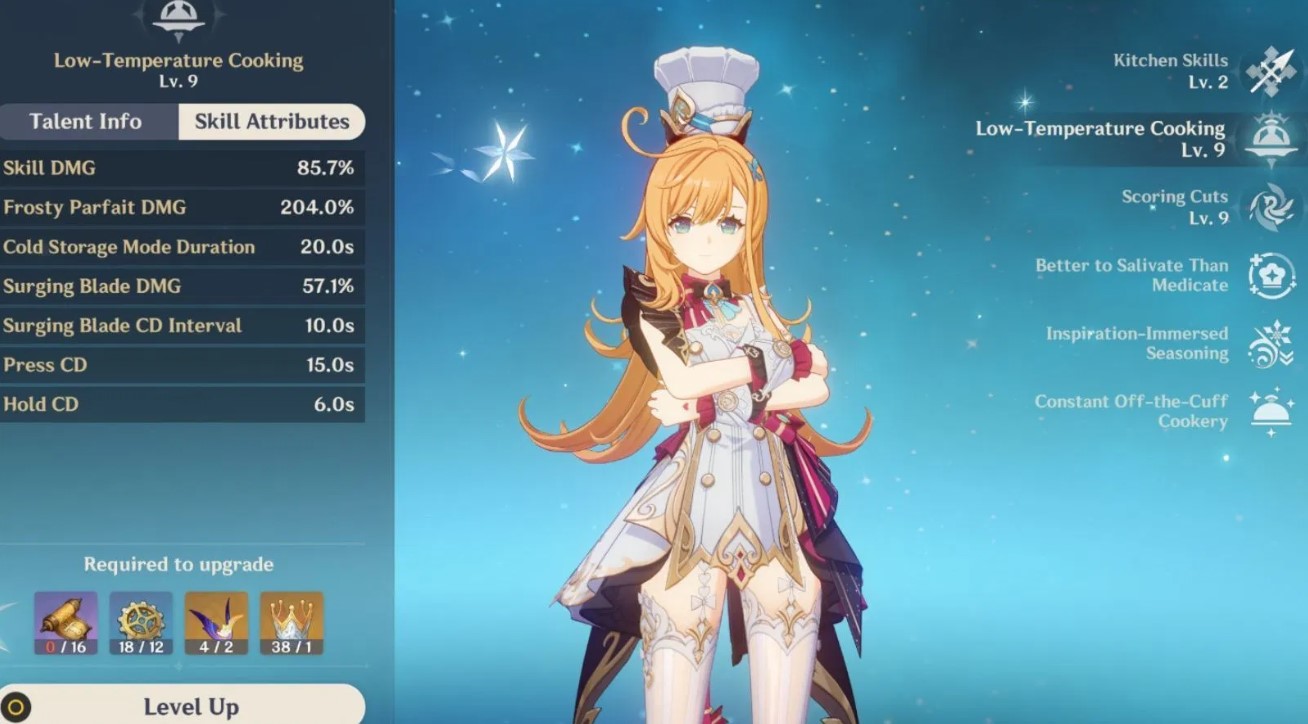
Off-field Cryo damage. Her Skill, Low-Temperature Cooking, has a fifteen-second cooldown. Tapping it deals area Cryo damage and opens Cold Storage Mode, which fires Frosty Parfaits at nearby enemies at intervals while you play someone else. Holding it instead activates Off-the-Cuff Cookery Mode.
Healing that does not ask for an HP build. Her Burst, Scoring Cuts, costs 60 energy, deals area Cryo damage and heals nearby party members scaled on her attack. Her first ascension passive extends this – after the Burst, Rehab Diet runs for nine seconds and heals the active character every second for 138.24% of her attack. Because it scales on attack rather than HP, the same stats that make her hit harder also make her heal harder, which is rarer than it sounds and means you are never splitting your build.
Cryo CRIT damage for the party, at C1, sixty percent of it, for fifteen seconds after her Skill or Burst.
Worth noting what that bundle does to older characters. Ayaka, Wriothesley, Ayato and Childe were all drifting out of relevance before her, and a 55% resistance shred plus a party-wide Cryo crit buff is the sort of thing that pulls a 2021 unit back into current content without a single balance change.
Genshin Impact Escoffier Build, Which Is All About Being Empty
Here is where the build departs from what older guides will tell you, so pay attention to the reasoning rather than the list.
Earlier recommendations centred on Golden Troupe, which boosts Elemental Skill damage and rewards being off-field. Reasonable, and it is still a workable set. But the current consensus has moved to four-piece Finale of the Deep Galleries, from the Deepfire Construct domain, and the logic is worth understanding.
That set grants sixty percent Normal Attack and Elemental Burst damage while the wearer has zero energy. Escoffier’s Burst costs 60 energy. Casting it empties her, which puts her in exactly the state the set rewards, and she does not need to stand on the field for any of it. The set and the character were built for each other.
| Build Slot | Recommendation | Why |
|---|---|---|
| Artifacts | 4pc Finale of the Deep Galleries | 60% Burst damage at zero energy, which her 60-cost Burst creates |
| Alternatives | Scroll of the Hero of Cinder City, Blizzard Strayer, Golden Troupe | Cinder City works off-field; Blizzard Strayer for freeze teams only |
| Sands | ATK% | Everything she does scales on attack, healing included |
| Goblet | Cryo DMG | Her Skill and Burst both deal Cryo |
| Circlet | CRIT DMG | Her ascension stat already supplies 19.2% CRIT Rate at max level |
| Substats | Energy Recharge first, then ATK%, CRIT DMG, CRIT Rate | A 60-cost Burst on a 15s rotation is a real constraint |
| Signature weapon | Symphonist of Scents | Extra attack while off-field, plus attack for her and whoever she heals |
| Best 4-star | Sacrificer’s Staff | Attack and Energy Recharge while off-field, which is exactly her problem |
| Other 5-stars | Calamity Queller, Staff of Homa | Queller’s buff doubles off-field; Homa brings 66.2% CRIT DMG |
| Budget options | Prospector’s Drill, Favonius Lance, Deathmatch | Favonius for pure energy, Drill for off-field stacking |
Talent priority is Skill, then Burst, then nothing. Her Normal Attack genuinely does not need levelling – she is not standing on the field long enough for it to matter, and the materials are better spent elsewhere.
Two build notes that catch people out:
- That 19.2% CRIT Rate from her ascension is free, so do not over-invest in CRIT Rate substats. Her circlet wants CRIT damage.
- Energy Recharge is the first thing to fix and the first thing to stop fixing. Once her Burst comes back reliably on your rotation, further Energy Recharge is dead weight.
The Constellations, Ranked by Honesty
C1 is the famous one and it is also conditional, so judge it accordingly. Sixty percent Cryo CRIT damage to the party is excellent and it requires the same four-member count as the shred. If you are not running four Hydro or Cryo units, C1 is worth nothing at all.
C2 grants five Cold Dish stacks over fifteen seconds when Cold Storage Mode opens, and teammates spend a stack when dealing Cryo damage for a bonus equal to 240% of her attack. Note the wrinkle – hitting several enemies with one Cryo instance consumes a stack per enemy, so wide hits burn through the five faster than you would expect.
C4 is the quietly good one. It extends Rehab Diet by six seconds and gives each heal a chance equal to her CRIT Rate to heal an additional 100% HP and restore two energy, up to seven times per Rehab Diet. Energy restoration on a character whose main constraint is a 60-cost Burst is a direct fix for her weakest point.
C6 fires an extra Special-Grade Frosty Parfait for 500% of her attack as Skill damage whenever the active character lands a Normal, Charged or Plunging Attack, capped at once per half-second and six times per Cold Storage duration. Which means C6’s value depends entirely on whether your carry attacks frequently – enormous behind a fast normal-attack unit, modest behind someone whose damage comes from Bursts.
C3 and C5 are talent levels, as always.
The Banner, In Plain Numbers
Her rerun is Phase 2 of Version 7.1, and it is her second time back since her Version 5.6 debut in 2025.
- Dates: October 13 at 18:00 to November 3 at 14:59, server time.
- Her banner: La Chanson Cerise.
- Running alongside: Void Star’s Advent, featuring Skirk, also Cryo.
- Shared pity: Both character banners draw on the same Character Event Wish counter, so pulls on either one advance the same guarantee, and progress carried over from Phase 1.
- Featured 4-stars on both: Dahlia, Candace and Mika.
- Weapon banner: Epitome Invocation, with Azurelight for Skirk and Symphonist of Scents for Escoffier, plus Sturdy Bone, Sacrificial Greatsword, Favonius Lance, The Widsith and Sacrificial Bow.
- Rates: 0.6% base for a 5-star, hard guarantee at 90 pulls, 50/50 on the first one.
- Test Run: A trial event runs during the wishes, so you can take her for a spin before committing.
That shared-pity detail is the one worth acting on. Two Cryo five-stars on one pity counter, both of whom want the other on the team, is as clean a pull window as this game offers – and if you lose a 50/50 on Skirk’s side, you come back to Escoffier’s banner with a guarantee in hand.

FAQ
Is Genshin Impact Escoffier worth pulling?
If you own Furina and a Cryo or Hydro carry, she is one of the strongest supports available to that team. If your best teams rely on Anemo grouping and a Pyro buffer, she asks you to rebuild rather than slot in.
What does the four-member rule actually do?
With one, two, three or four Hydro or Cryo characters in your party, enemies hit by her Skill or Burst lose 5%, 10%, 15% or 55% Hydro and Cryo resistance for twelve seconds.
What is her best artifact set?
Four-piece Finale of the Deep Galleries, which grants sixty percent Burst damage at zero energy – a state her 60-cost Burst creates every rotation. Blizzard Strayer remains reasonable in dedicated freeze teams.
Does she need HP for her healing?
No. Her healing scales on attack, so an attack-and-crit build serves both her damage and her sustain.
Is C1 worth chasing?
Only if you run four Hydro or Cryo characters, since C1 carries the same requirement as the shred passive. Under that condition it grants the party sixty percent Cryo CRIT damage.
When does her banner end?
November 3 at 14:59 server time, after which Version 7.2 is expected to bring Mitya and Valeriy.
Who benefits most from her?
Cryo and Hydro carries that were falling behind – Ayaka, Wriothesley, Ayato and Childe all return to viability – plus Skirk and Neuvillette at the current end of the scale.
Stand on the Cliff or Skip the Climb
What makes this character interesting is not that she is strong. Plenty of supports are strong. It is that she was designed with a threshold instead of a slope, and thresholds force decisions in a way that gradual scaling never does.
A character who gave 20% shred regardless of team would be easier to own and far less interesting to think about. Instead, she gives you almost nothing at three Hydro or Cryo units and a great deal at four, which means there is no half-commitment available. You either build the team she wants or you have pulled an expensive healer who shreds fifteen percent.
So the question to answer before you spend ninety wishes is not whether her kit is good. It is whether you can field three more Hydro or Cryo characters who are worth playing, and whether you are willing to run that team without Anemo grouping.
If yes, she is the best thing that has happened to Cryo since Cryo stopped being a joke. If no, Version 7.2 is three weeks out, and your primogems will still be there.
Her banner closes November 3. The cliff does not move.
Bookmark this post, since artifact consensus on her has already shifted once and Version 7.2 lands before the month is out, and we revise this page rather than filing a fresh one. And if creative or commercial collaboration brought you here, write to the BandurArt team directly – we count to four reliably.